Streaming Service
Preface
At Village, we try to make our services accessible to people, whether or not they’re able to make it in to church on Sunday.
On Sundays, we stream service live to YouTube. This section is all about how that works, and what we do to make it happen.
BoxCast
Village Bible Church uses the platform BoxCast to handle its livestreams.
BoxCast can take feeds in from a variety of sources and exposes them to the broader internet through broadcasts.
To manage BoxCast streams, access the BoxCast Dashboard.
Monitoring a Broadcast
Stream Health
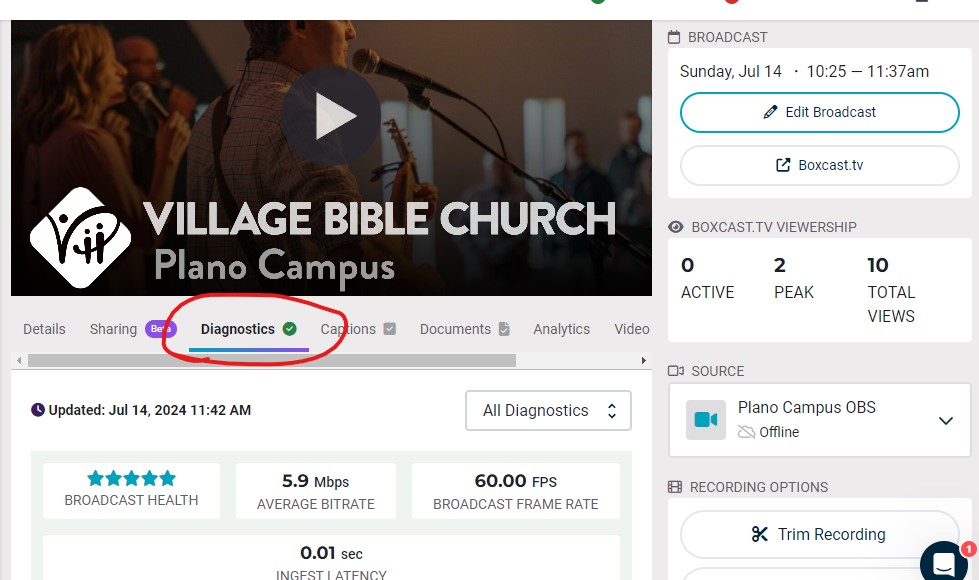
From the Dashboard, you can find the broadcast that’s going out for any given service. During service, you may want to open up the Diagnostics tab. If there is a problem with the stream, this page will alert you.
Adjusting Broadcast Times
The default broadcast times are meant to go a bit longer than the typical service, just in case things run late. But that means that after service is over, the stream will keep rolling for ten or even fifteen minutes of people walking back and forth after service.
On the other hand, sometimes there is a special event such as a baptism which pushes the service past the scheduled time.
During a live service, buttons are available to either end a broadcast immediately, or to extend it. Use these as necessary to align the broadcast times with the service.
Parts of the BoxCast Dashboard
Sources
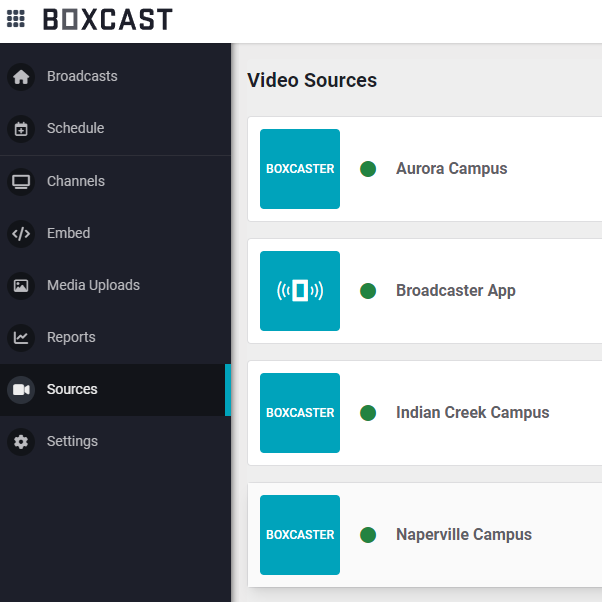
All available sources need to be registered in the Sources tab of the dashboard. Most sources use the physical “BoxCaster” device that can currently be seen behind the AV2 monitor, under the tripod.
For Plano, however, our OBS stream comes in over RTMP.
Whatever the source, you’ll see on the dashboard whether a given source is online, or see notifications if a particular source needs attention.
Broadcasts
Streams over BoxCast are scheduled well in advance to line up with service times. You really shouldn’t need to adjust anything on the broadcasts.
Once exception to this would be for holiday services like Easter Sunday, where the number and times of services might be different from the standard schedule.
Channels
Broadcasts in BoxCast are organized into different channels. Typically this is used to group campus streams together. A channel can have its own direct link, like this one for Plano!
Destinations
Within a single broadcast / series, you can configure an additional destination. For us, that means the Plano Campus YouTube Channel.
We do not have the access to make changes to the destination itself. If you encounter issues with connecting BoxCast to YouTube, email Pastor Steve about it.
Add a New Broadcast
Click the Schedule button on the main page of the dashboard to add a new broadcast to the schedule. Here are some guidelines:
- Include the campus name in the title
- If it’s for a holiday service, but that in the title, too
- If it’s a regular service, include the time
- Add it to the appropriate channel
- Select the corresponding source
You can leave the other settings alone.
Streaming service to the web, as well as to other screens in the building, is done on the second computer, using Open Broadcaster Software’s OBS Studio.
OBS Studio
The program is fairly straightforward: it can take a variety of inputs, combine them, and send the output somewhere.
Interface
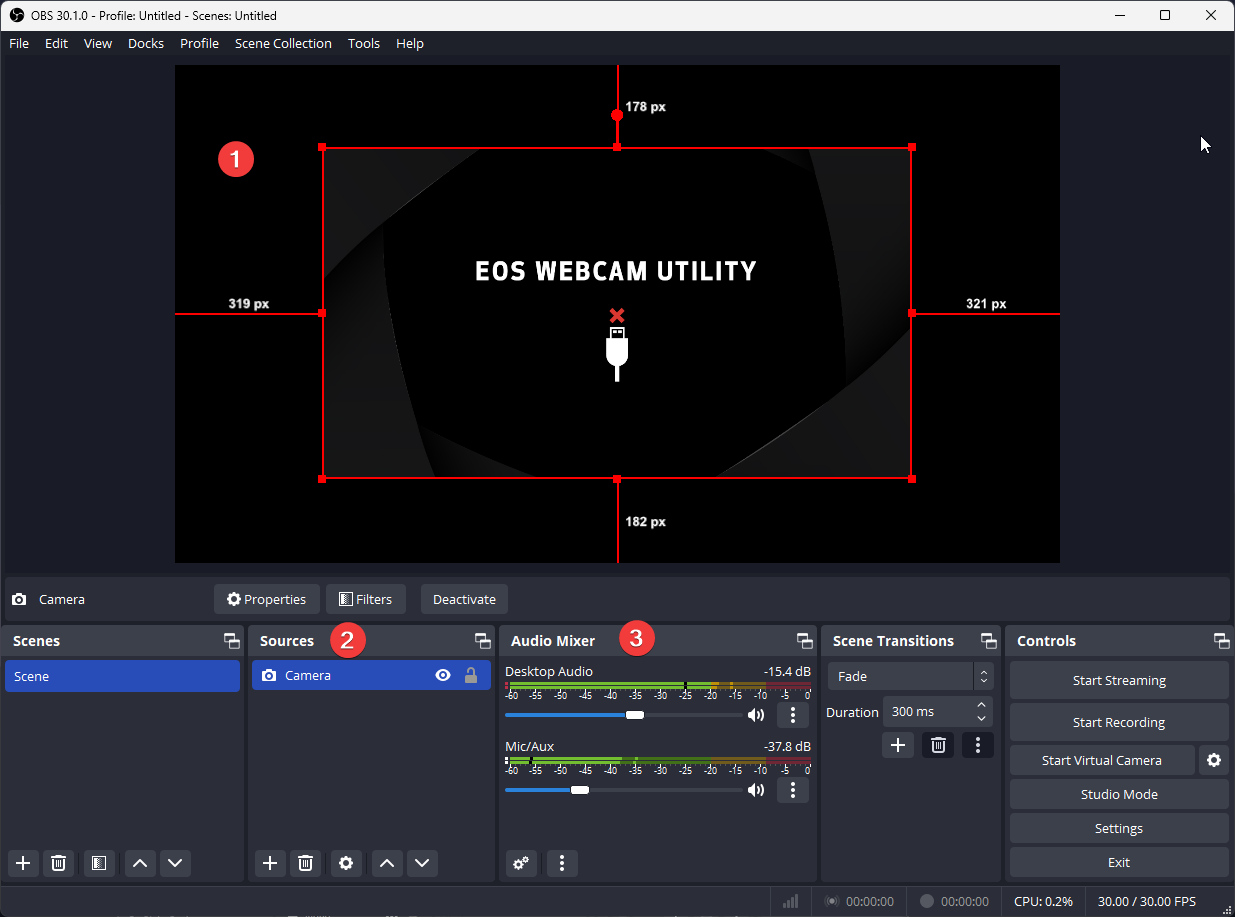
Output Preview
This area shows what is being sent to the stream output, known as the Program. Individual sources, like the camera feed, can be resized and moved around here, though we mostly just have them shown fullscreen.
Sources
This is a list of configured sources. They can be turned on and off. You can also add new sources by clicking the plus, though this would be uncommon. The main sources are already set up.
| Source | Description |
|---|---|
| Close Camera | The DSL camera with the big lens. Great for close-zoomed shots. |
| Wide Camera | The small camcorder. Not as crisp of an image, but gets really wide shots. |
| AV1 NDI Stream | Any media coming from the AV1 machine, like sermon bumpers, worship lyrics, etc. |
| Line In | Audio from the board |
| Line In (Monitor) | Audio from the board, but straight to the headphones, for separate volume control |
Audio Mixer
This shows all the audio sources coming into the computer. Each can be individually adjusted for volume, muted, etc.
OBS will really just be playing whatever audio comes in from the sound board. There should be no need to adjust these unless you notice that the volume is off, but you can change the volume on the headphones as you like.
Studio Mode
In studio mode, we can see two feeds: preview and program. The Program is what is going out on the stream. Preview is exactly what it says: previewing a different scene / source without altering the stream.
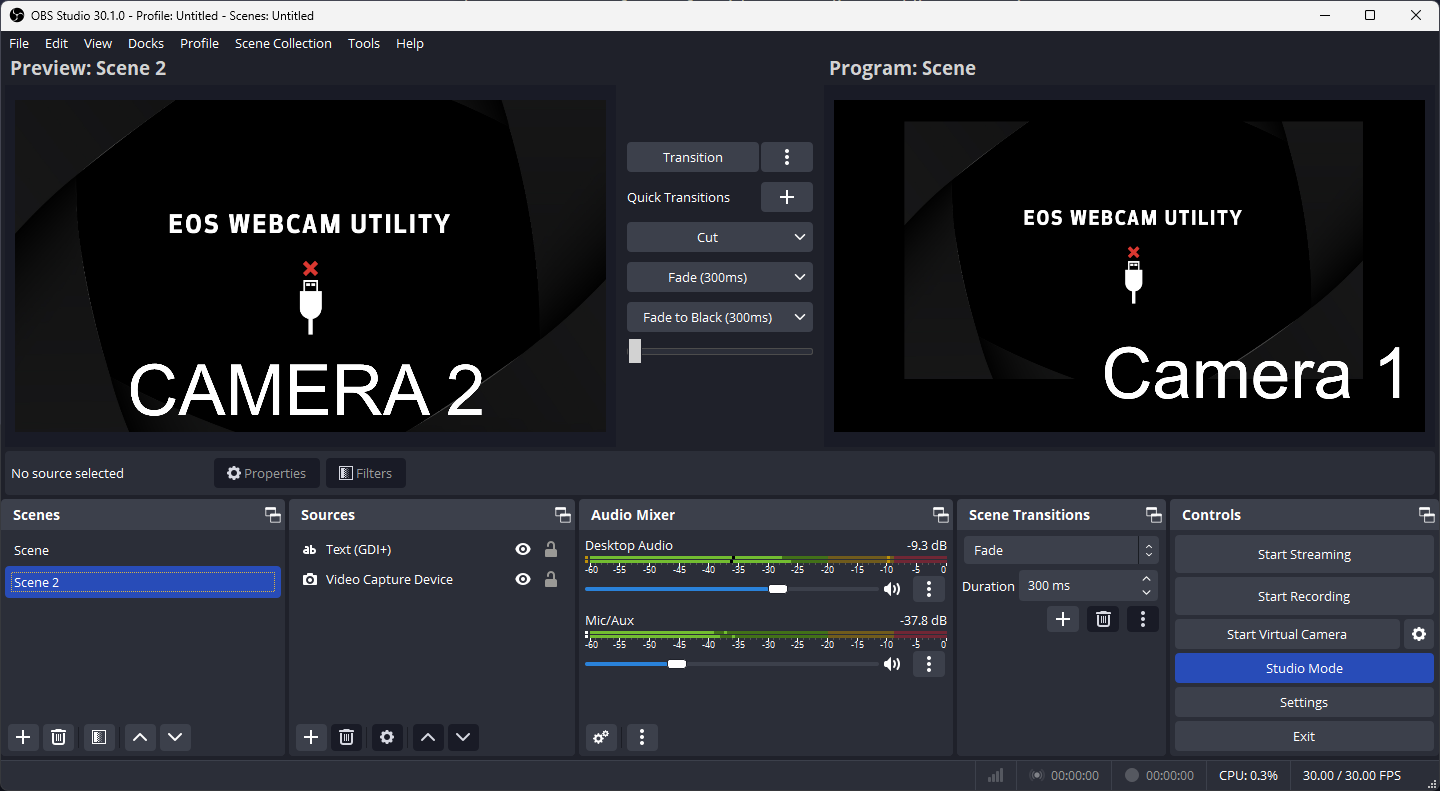
Scenes
A scene is the collection of sources and audio you’ve configured. We currently have two scenes, one for each camera. We could also have scenes with just a camera and no ProPresenter overlay, or even things like a view of another program or web page. Not that there is any need for such things presently, but it’s possible.
In OBS’s normal mode, clicking a scene switches directly to it. In studio mode, though, you can preview the new scene before cutting over.
Transitions
You can adjust scene transitions in the bottom menu bar, or in the margin between your preview and active panels. A one-second cross-fade is a nice default.
Outputs
The streaming computer sends a second HDMI output to the backstage and foyer screens, but you can’t actually see the screen from the computer. To get OBS to send an output to those screens, simply right-click the program and choose Fullscreen Projector and select the second screen.
OBS should remember its projector position and re-open it every time, so you shouldn’t need to do this unless the stream is empty.
Direct Streaming
Setup
This section is mostly for reference only. The computer’s already set up for streaming, and you should not need to adjust any of these settings yourself.
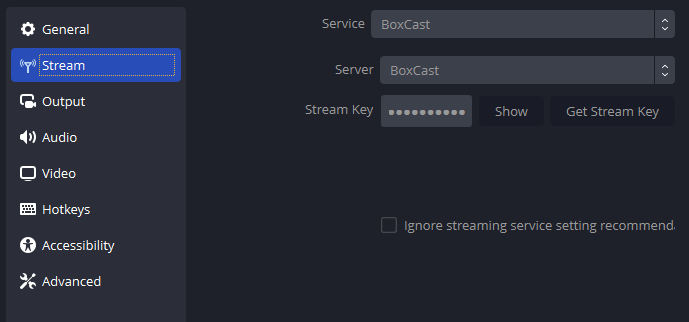
BoxCast Streaming Key
In the OBS settings, we can put the BoxCast streaming key in. When streaming is turned on in OBS, BoxCast will automatically see this as a valid source, and pass it through to any active broadcasts configured to look for it.
Output Settings
| Video Bitrate | 6000kbps |
| Audio Bitrate | 160 |
| Video Encoder | Software (x264) |
| Encoder Preset | Slower |
| Audio Encoder | AAC |
Audio Mixing with X32 Edit
The sound board operator is mixing for the room. This doesn’t always correlate to sounding good on the stream.
On the streaming PC, there is a program called X32 Edit. This program connects to the sound board, and can interact with it.
Stream Output
On the sound board, there are a number of different outputs configured. One of them is specific to the stream; it is the audio mix going into the streaming PC.
Having a different mix for the stream gives us the flexibility to do things like muting the PC output during announcements, without impacting the room sound. (The stream’s announcements audio already comes over NDI.) But we can also adjust the levels to better balance the different elements for the stream.
If you change the faders on a channel, you might be affecting the audio in the room! You have to activate the recording output first!
Working with the Stream Output
On the right side of the application, you can see the outputs listed. Click on the Recording output.
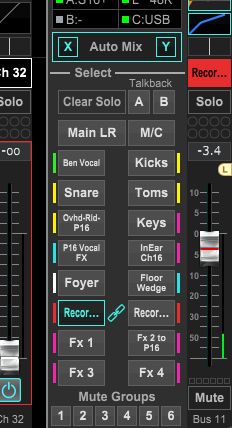
When the recording output is active, the faders will be outlined in red. If you see that, it is officially safe to make changes, as those will only impact the audio on the stream itself.
Getting the Mix Right
This part is totally up to you, and largely just a repeat of the sound board training.
Bass too low? Someone else is lead vocals on the next song? Grab the faders and adjust! Noise-cancelling headphones will help, but if it sounds good in your ears, it will sound good on the stream.